Corne v4 Keyboard Keymap
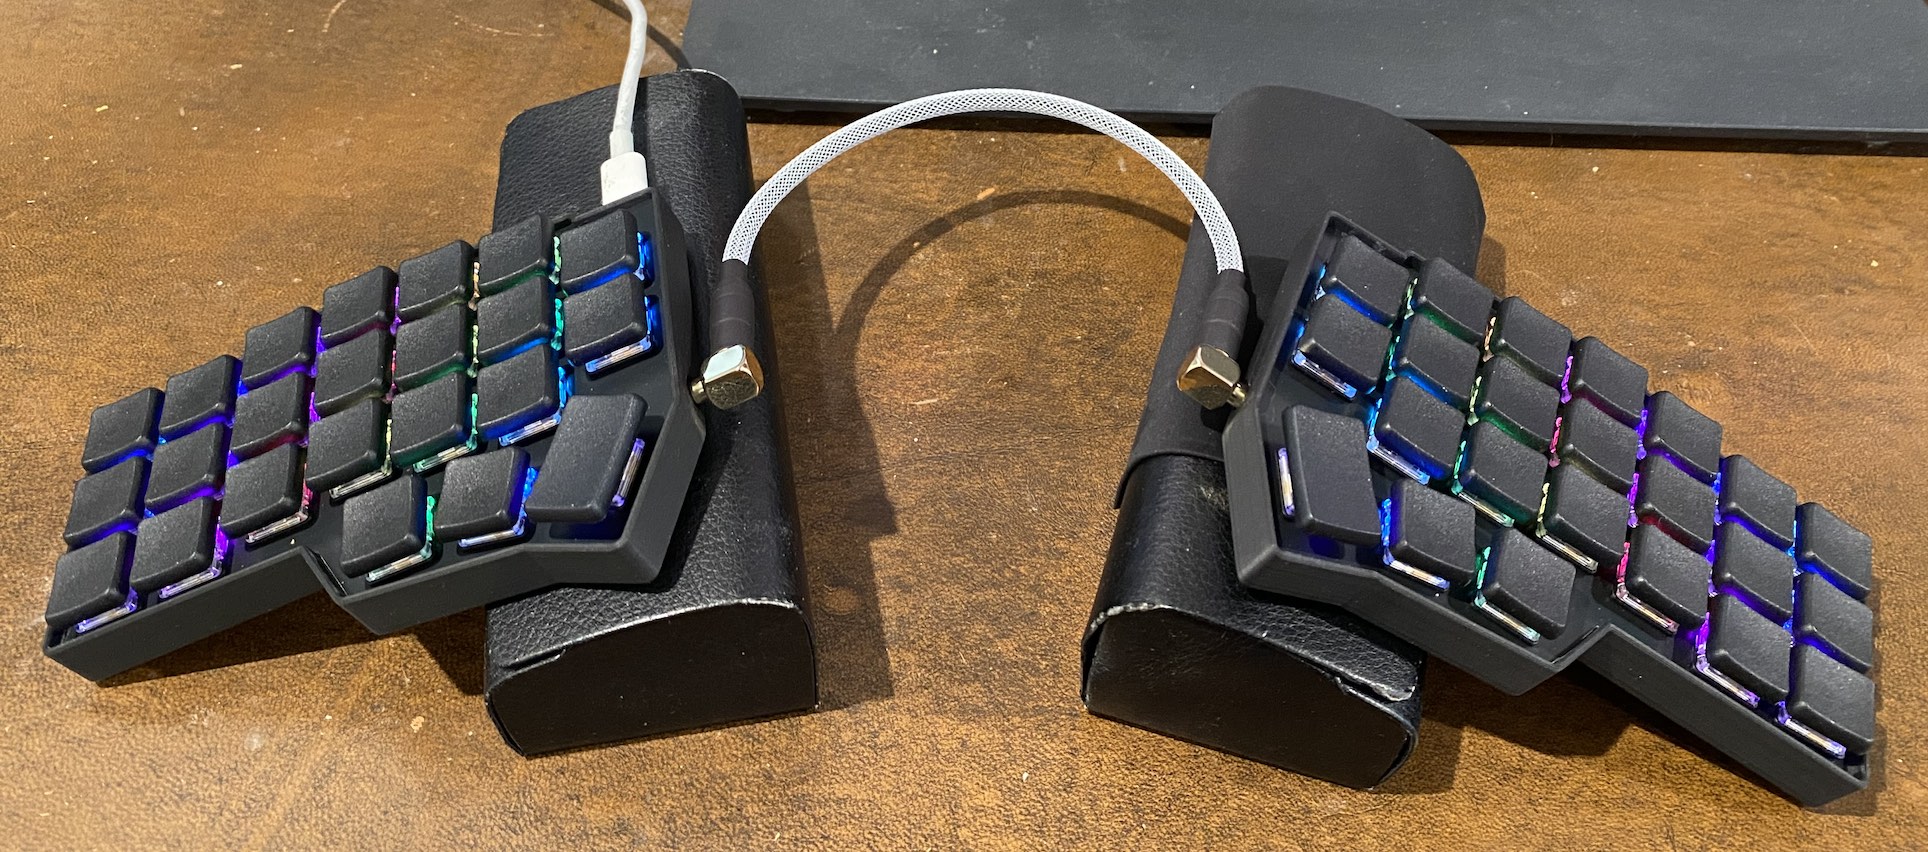
I recently acquired a pre-built Corne 46-key ergonomic split keyboard.
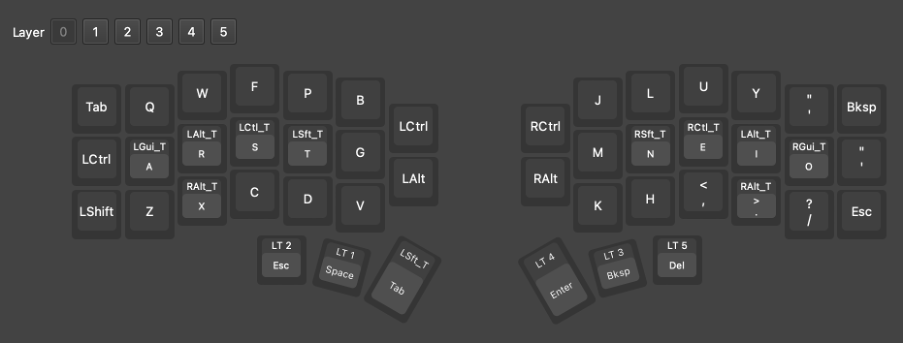
Rather than use the default QWERTY keyboard arrangement, I have programmed it to use a COLEMAK-DH layout, which allows for much more efficient typing. Because there are a reduced number of keys, many of the keys need to be overloaded with multiple functions. This is normally done with two techniques:
- Tap-Modifiers: If you tap a key, it will output its normal character. However, if you hold the key, it can act as a modifier such as Shift, Ctrl, Alt, etc.. This means you don’t need to dedicate separate keys for this, and these modifiers can be placed on the home row of the keyboard where you don’t need to reach for them.
- Layers: just like how you hold the SHIFT key to get uppercase characters, you can define layers of your keyboard that can be accessed through “custom SHIFT” aka “layer” keys.
The layer scheme that I chose is based on a 36-key layout called “miryoku ”, which is a well thought-out design for minimalist keyboards. The layers are selected through the three keys at the bottom of each half by using your thumbs.
- The BASE layer is used to access normal letters and a few punctuation characters.
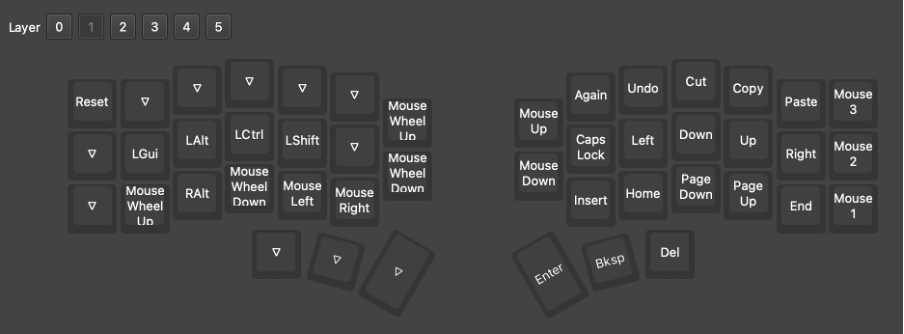
- The NAV layer gives you access to cursor movement, scrolling and mouse keys to let you move around efficiently.
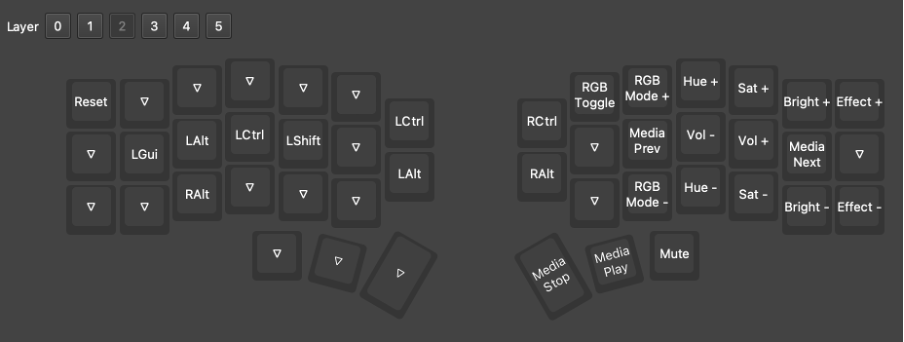
- The MEDIA layer lets you access media controls such as play, pause, skip as well as volume controls and the RGB glow settings of the keyboard.
- The NUM layer gives you access to a numeric keypad, and the SYM layer gives you access to the various symbols you can access via a numeric keypad.
- The FUN layer gives you access to function keys such as F1, F2, … up to F12
The firmware in this keyboard only supports 5 extra layers on top of the BASE layer, whereas the miryoku scheme called for a BASE layer plus 6 additional layers. I could have reflashed the device with a custom firmware to allow more layers. However, there would be a risk of running low on resources in the controller. Instead, because I have 10 extra keys on this keyboard (46 keys as opposed to miryoku’s desired 36 keys), I decided to do away with miryoku’s MOUSE layer and instead put those mouse-related keys into the NAV layer. This then allows me to add an extra SHIFT function to one of the thumb keys which may come in handy instead of juggling the home row SHIFT key modifiers.
The layers can be programmed with a user-friendly open-source app. The screenshots below show the various layers I initially set up on the keyboard:
BASE Layer (LT0):
NAV Layer (LT1):
MEDIA Layer (LT2):
NUM Layer (LT3):
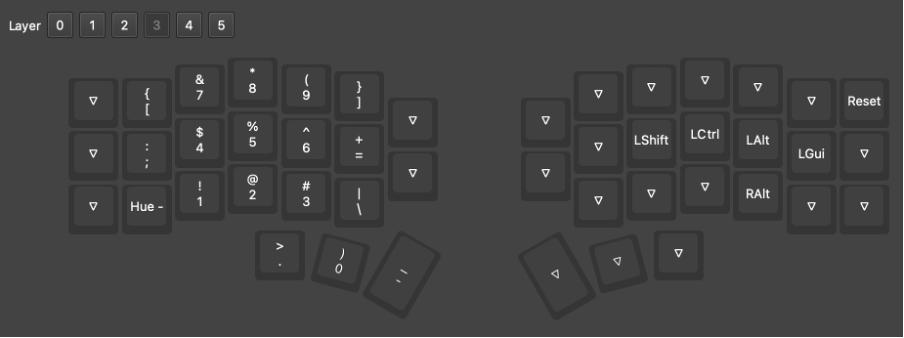
SYM Layer (LT4):
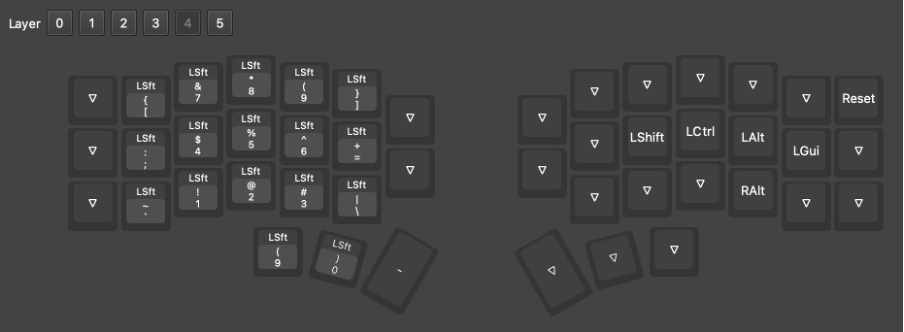
FUN Layer (LT5):
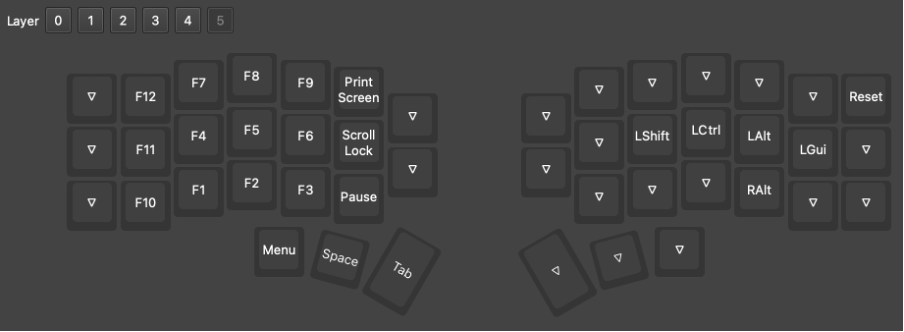
Next Steps:
This is just an initial proposal, which may well change over time as a get more experience. Things I will be working on going forward:
Learn the COLEMAK-DH keyboard layout. After using QWERTY keyboards for most of my life, the muscle memory needs to be retrained. I think it will be worth it though, as typing on QWERTY keyboards is very fatiguing, whereas with COLEMAK-DH, the hands hardly move, and (nearly) all the keys are only one key away from the home keys. I will train my fingers using the online tool https://www.keybr.com/ , which starts training you on just the home keys, and then introduces additional keys as your typing improves. For more general practice and speed tests, there is of course https://monkeytype.com/ .
Define a COLEMAK-DH keyboard layout on my macbook laptop, which is similar to the miryoku setup on the Corne physical keyboard. This means I can still practise using the layout and layers even if I don’t have the keyboard with me. There are 3 options here:
- use a COLEMAK-DH input method in macOS. This defines the layout of the letter keys, but doesn’t implement layers, ie. you need to move your hands away from the home keys to type numbers, access cursor keys, etc.. It is also not so easy to customise this.
- use KMonad to implement a layered keymap. The author of the miryoku has provided some tools to facilitate generating a suitable keymap. I can start KMonad manually in a terminal window to intercept keystrokes and remap them. It works and is cross-platform, but is a bit clunky, and tweaks require the toolchain to be modified and rerun to generate new keymap files each time.
- use Karabiner-Elements to remap my Mac keyboard. This needs to be set up using some JSON code , but it integrates well with the Mac, and tweaks are relatively easy to do in real time.
Build a smaller keyboard from parts so I can leave the Corne at home and carry a travel-friendly version. When using other PCs, it may not be convenient or even possible to play with keymaps, whereas a physical keyboard just needs to be plugged in and the PC will be none the wiser about your customised key mapping.
I’ll post updates here as I gain more experience and have something to report.